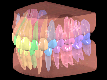
Tooth Surfaces
This is the last area that we'll cover in this lesson. To help introduce you to the subject of tooth surfaces, let me give you an example.
Suppose you tell me that you need tooth #9 filled because it has a cavity. First of all, did you realize that you just told me that the maxillary left central incisor has the cavity?
In order to work on tooth #9, I will put the tooth to "sleep" by giving you a local anesthetic . Once tooth #9 is "sleeping", I start to work on it. All of a sudden, you realize that I am working in the wrong area on the tooth! Doesn't sound great, does it? We avoid issues like this by giving each side of a tooth a specific name. These sides on a tooth are called tooth surfaces.
The crown of any tooth is divided into surfaces and these surfaces are named according to the direction in which they face. 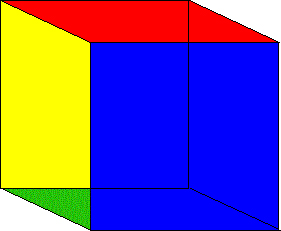
Let me demonstrate the idea of tooth surfaces by using a box. If the box is sitting on a table, we can see that it has 5 sides to it (not including the side the table is touching). If I asked you to draw an O on the top of the box, you can easily do that since you know which side or surface is the top. You could also label any of the other sides, if I told you which side I was talking about. Let's go to the next page to show you how these principles can be applied to a tooth.
